In a world that demands effective and professional communication, tools like Smoreapp emerge as the perfect solution for creating engaging visual content that speaks to your audience, whether you’re a teacher connecting with parents or a business owner promoting your services.
But often, this creative journey begins with a seemingly simple request: your phone number.
This step, while a standard security measure, raises concerns for many about privacy and the blurring lines between personal and professional life.
This guide doesn’t just offer a solution to this problem; it gives you a clear strategy to create Smoreapp account without phone number
What is Smoreapp?
A service for designing and publishing simple marketing content in the form of one-page websites called “flyers” or newsletters.
It’s used for marketing ideas, promoting events, or selling products, and includes various educational uses.
Key features of Smoreapp:
- Allows users to easily create visually appealing “flyers” on computers, tablets, and mobile phones.
- Teachers use it to create classroom newsletters, reports, book reviews, evaluations, and even for activities like fundraising.
- The application is user-friendly and includes tools to analyze views and engagement with the flyers, which can also be printed.
- An Educator version is available that allows students to innovate and be creative within an assigned quota, while the free version is limited to a certain number of flyers per month.
Smoreapp is the ideal tool for:
- Educators: To share classroom news with parents, send assignments, and announce school activities.
- Small Businesses: To promote products, announce events, and build a mailing list to communicate with customers.
- Non-Profits: To share success stories, raise funds, and keep the community informed.
Why Should You Separate Your Personal Number from Your Professional Accounts?
When using a tool like Smoreapp for professional or educational purposes, linking it to your personal phone number can lead to an unwelcome overlap between your personal and professional life. Here are a few reasons to think twice before this step:
- Maintaining Professional Boundaries: Using a dedicated number for verification prevents professional communications or customer inquiries from reaching your personal number at inappropriate times.
- Avoiding Spam: Once your number is associated with an online account, the risk of it being added to random marketing lists increases.
- Enhancing Security: In the event that someone gains access to your account, not having your personal phone number as a direct link adds an extra layer of protection to your identity.
Non-Voip: The Professional Solution for Secure Verification
To overcome this hurdle without compromising on security, services providing real, temporary numbers like Non-Voip come into play.
This service provides you with a real phone number (not a virtual VoIP number that can be easily blocked), specifically for receiving the activation SMS from Smoreapp.
You use the number for this specific task, ensuring your account is successfully activated while keeping your primary number’s privacy completely intact. It’s the solution that combines effectiveness with security.
Read more: Buying US Numbers +1 Made Easy with Non-VoIP
Steps to Create Smoreapp account without phone number
Follow this solid plan to create Smoreapp account:
Phase 1: Obtain Your Secure Activation Number
1. Prepare Your Verification Number
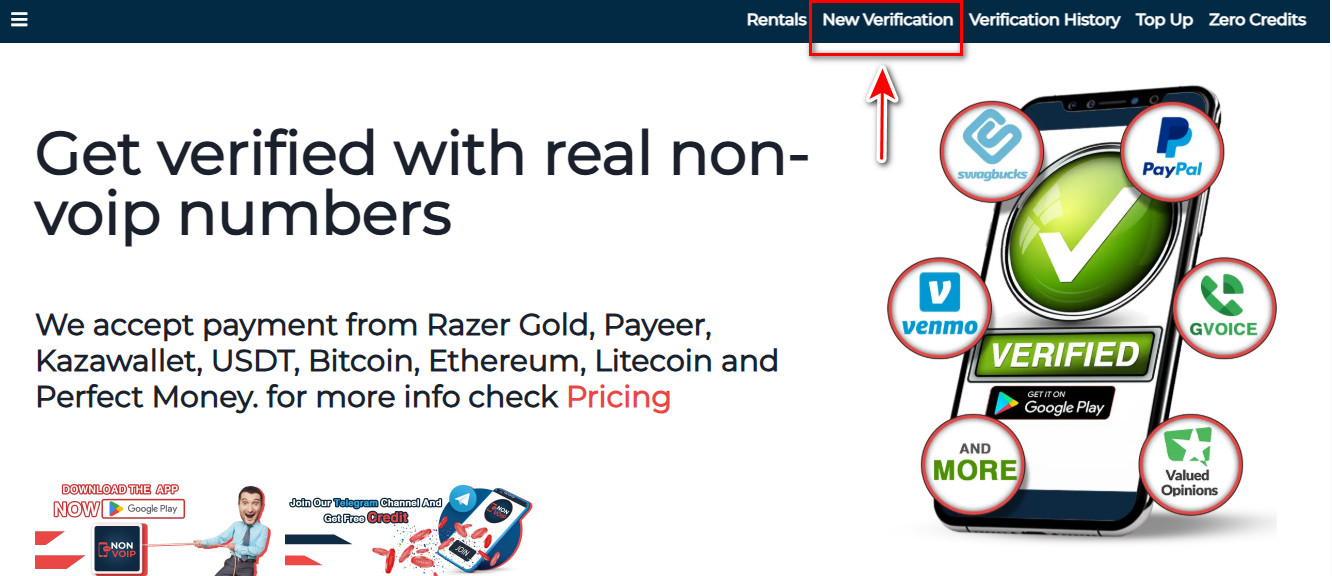
- Go to the official Non-Voip website. You’ll need to log in or, if you’re new, create an account first.
- Navigate to “New Activation” on the site.
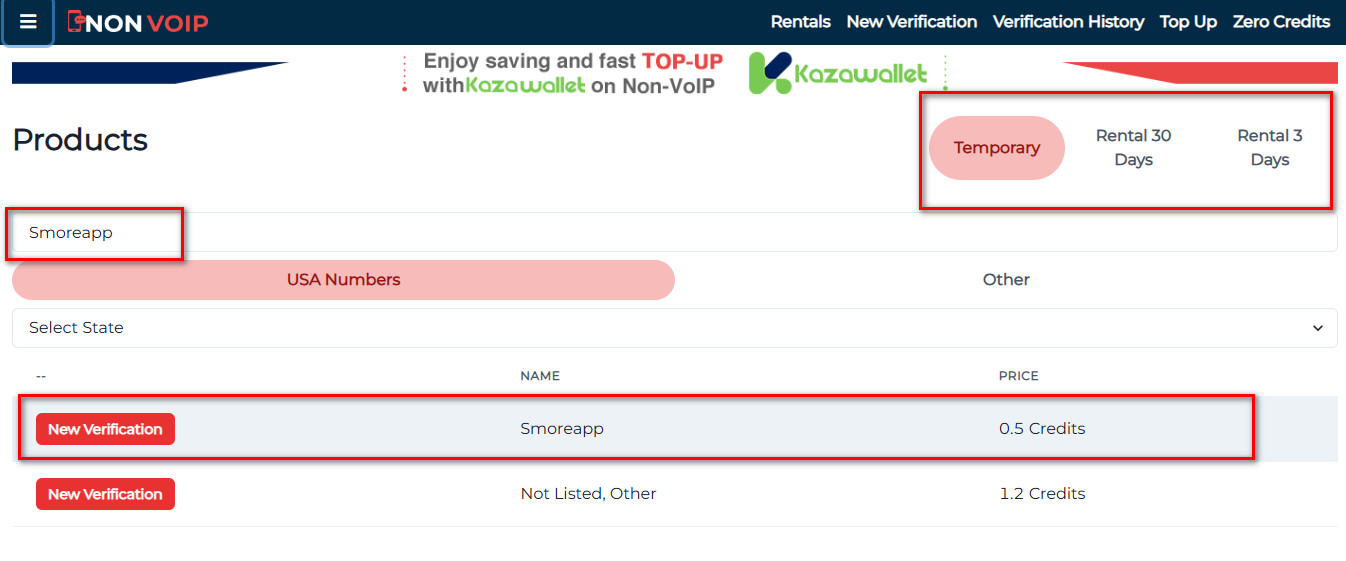
- Search for the Service: Use the search bar to find “Smoreapp”.
- Choose Your Number: Select the type of number you need (e.g., temporary for 15 minutes, 3 days, or a month) and click “New Activation”.
Phase 2: Create Smoreapp account
- Go to the Smoreapp Website: Click the “Sign Up for Free” button to start the registration process.
- Enter Your Information: You can sign up using email, or your Google or Facebook accounts.
- The Verification Step: If you are asked to enter a phone number to verify your account, use the number you obtained from Non-Voip.
- Receive the Code: Return to your Non-Voip dashboard, where you will find the verification code sent by Smoreapp.
- Complete Registration: Enter the code on the Smoreapp site to finalize the verification.
Conclusion
By following these steps, you have created a professional and ready-to-use Smoreapp account without phone number while building a strong privacy wall around your personal information.
Now you can focus on what truly matters: designing creative content and sharing it with your audience with complete confidence and security.